
REVIEW · LAKE WANAKA ADVENTURES
Wanaka: 4-Hour Intermediate Waterfall Cable Climb
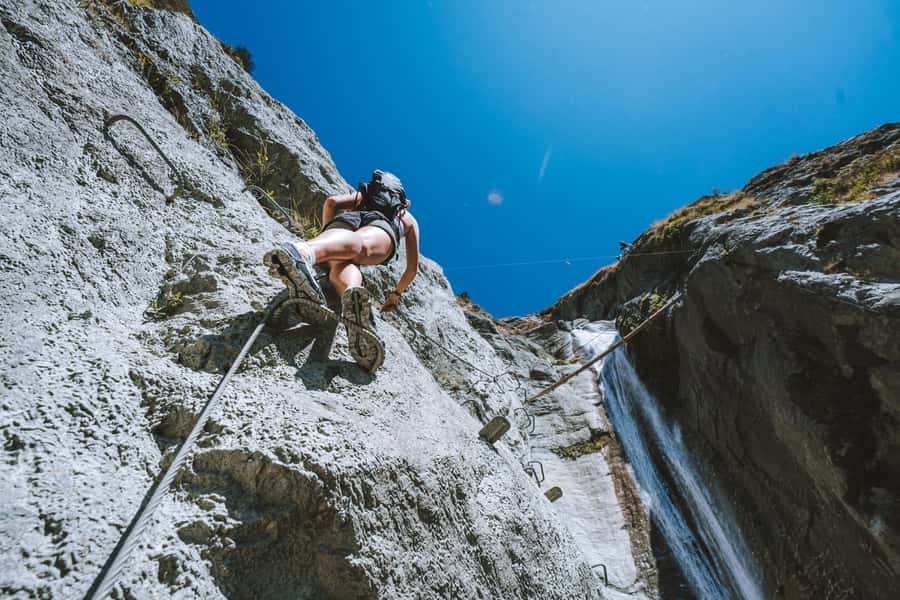
Up a waterfall, with your feet on rungs. This world’s highest waterfall climb turns Lake Wanaka into a vertical playground, with big mountain, lake, and farmland views as you work your way up. I love that the experience is built for real people, with a hands-on training climb and small groups of no more than 5 per guide, so you get attention without feeling herded.
Here’s the main thing to consider: you’re climbing in an exposed environment where you must stay focused and keep yourself properly hooked into the system. If heights make you panic, or if you struggle with full-body mobility, this is a hard day to fake confidence.
Key Things I’d Not Skip on This Wanaka Cable Climb

- 320m of vertical climbing on the intermediate route with cables, iron rungs, pegs, ladders, and the constant teamwork of guide plus gear
- Practice first at the base of Twin Falls so you learn the motions before you commit to the full line
- Blue pools, plus suspension bridges that add both thrill and serious wow-factor photos
- A lunch stop at the base of a 60m waterfall where you can recharge and even take a quick dip
- Small group size (max 5 per guide) for better pacing, safety checks, and fewer waiting moments
- You stay responsible the whole time since you have to stay properly connected to the climbing system
Why Wanaka’s Waterfall Cable Climb Feels Different Than a Typical Hike

Wanaka is famous for views, but this activity flips the script. Instead of looking across the lake, you’re climbing up beside it, on a route that follows a waterfall system and uses fixed gear like cables, rungs, pegs, and ladders. The selling point is simple: you get to experience the highest waterfall cable climb in the world, in a half-day format that stays guided and structured.
I like that the setting does not feel like a theme park. You’re moving through real terrain, seeing farmland, mountains, and lakes opening up around you as you climb. Even at the intermediate level, the route is still adventurous: blue pools, cliffy sections, and suspension bridges that make your brain wake up fast.
The value also comes from what you don’t have to arrange. You get the climbing safety equipment, you get a briefing, and you get an introductory training climb before the main route. That matters, because the day is built around technique and confidence, not just toughness.
The 4-Hour Flow: Practice, Climb, Lunch at the 60m Waterfall, Then Down Again
This is a 4-hour guided outing. The day is paced like a progression: learn, do, then recover.
You start by meeting at the Twin Falls Waterfall meeting area, then you’ll get a safety briefing. After that, you grab helmets and a harness and do a practice climb at the base of the waterfall. This training section is there for a reason. The real climb uses a system where you’re constantly connected and you learn how to move while hooked in.
Once you’ve mastered the practice route, you join your group for the intermediate climb. Your route is described as climbing 320m of vertical cliffs, crossing over blue pools, scaling sections of rock, and using suspension bridges. There are also natural pause moments built in, including a stop on a bridge next to a huge cascading waterfall where photos are a logical stop, not an afterthought.
When you reach the summit area, you relax for lunch at the base of a 60m waterfall. From there, you get a break to refuel, and the experience may include time for a quick swim if conditions allow. Then it’s time to head back down: a 45-minute descent to the starting point.
That descent timing is a big deal. People often think “climbing up” is the hard part. In reality, the way down can be just as mentally tiring. The good news is your return is planned and guided, not improvisation.
The Gear and Training That Make the Intermediate Route Work

You do not need previous climbing experience. That said, you do need the ability to move your body through the positions the system requires.
You’ll use a combination of equipment and fixed infrastructure: cable, iron rungs, pegs, bridges, and ladders. It’s very hands-on. The key difference from a normal hike is that you’re not just stepping forward. You’re managing your connection point while you climb and cross sections that can feel exposed.
Before the main climb, the guides run you through an introductory training climb at the base of Twin Falls. For first-timers, this is where you get your rhythm. You practice the route mechanics so the intermediate sections later are about staying calm and making steady moves, not about guessing.
From a practical standpoint, the day requires full body mobility. You’re also asked to have a moderate level of fitness since it combines hiking, rock climbing, and walking. I like this clarity. It helps you self-check honestly before you show up in the wrong shoes or with the wrong expectations.
What You’ll Actually Climb and Cross: Cliffs, Blue Pools, and Suspension Bridges

The intermediate route is all about balance between thrill and control. You’re climbing up 320m of vertical cliff sections, not just scrambling a trail.
You should expect sections where your feet land on iron rungs and your hands manage the cables or pegs. Then you cross over blue pools, which adds a visual and mental shift from pure rock climbing. The waterfall environment means you’re surrounded by water sound, misty air at times, and a constant reminder that you are working on an active natural structure.
The standout features are the suspension bridges. These aren’t just decorative. You scale and cross while wearing a harness and staying hooked into the climbing system. That combination is what makes the bridges feel intense. You get that classic “am I really doing this” moment, but your guide system is designed to keep you safe.
There’s also a planned stop next to a huge cascading waterfall, where you can pause on a bridge for photos. The fact that it’s built into the route schedule is important. It means you’re not risking a rushed stop while the group is waiting.
Finally, when you reach the summit, you’re not thrown into a long dry spell. Lunch happens at the base of a 60m waterfall, which makes the climb feel like a complete loop, not just a ladder-to-the-sky grind.
Lunch at the Base of a 60m Waterfall: Why This Break Feels Like Part of the Tour

Included lunch is a real quality-of-life win here. At the base of the 60m waterfall, you get a chance to sit down, eat, and reset your energy before the descent.
This stop matters for more than comfort. The intermediate route is mentally demanding. Even when you feel secure, concentration is constant: you need to watch your connection points, keep your body moving with intention, and manage exposure.
A quick swim is also mentioned as an option, and I get why. After climbing near waterfalls, water feels like a natural reset. Even if you skip the swim, the views over the mountains and farmland are a great way to come down from “gear mode” into “human mode.”
If you want photos, this is also the best time to stop thinking and just be present. The views around Wanaka are a big part of the appeal, and lunch gives you the time to actually notice them.
Safety and Nerves: When the System Helps, and When You Must Stay Focused

The guides are a core reason this tour earns such strong ratings. People consistently describe guides as friendly, encouraging, and professional, with a safety-first approach.
The safety framework is built into the structure:
- Safety briefing at the start
- Helmets and harnesses provided
- Practice climb at the base first
- Small groups, max 5 per guide
- Continuous guidance while you move through the route
But here’s the part you should take seriously: you’re responsible for staying properly hooked into the climbing system while you climb. That means you can’t treat this like a casual walk-through. You need to listen, follow instructions, and keep your mind on your connection.
This also explains why height fear is a deal-breaker for some people. If you get stuck in panic, or if you can’t regulate yourself with heights, the exposed sections will be stressful. The route is thrilling, not mild.
So my practical advice is simple: if you’re only “sort of” okay with heights, don’t rely on willpower alone. Do the self-check early. The route demands full-body mobility too, so consider how your flexibility and balance are on a bad day, not your best day.
Price and Value: What You’re Paying For (and What You’re Not)

At $224 per person for a 4-hour experience, this is not cheap. But a lot is included, and that changes the math.
Included:
- Expert guide
- Lunch
- Climbing safety equipment and briefing
- Introductory training climb
That’s a meaningful bundle for one reason: you are not just paying for access, you’re paying for instruction and safety gear, plus a structured learning phase. In a climbing-style activity, the “hidden cost” can be equipment and coaching time. Here, both are part of the package.
Not included:
- Water bottle
That’s easy to fix. Bring one, because a waterfall climb still leaves you warm, and you’ll want water after the descent.
There’s also a logistics note that can matter more than you expect. Transport is rated extremely highly, with a 95% perfect score. So if you’re worried about wasting time on the drive or feeling rushed getting to the start, this is a good sign that the day is run smoothly.
Who Should Do the Intermediate Climb (and Who Should Skip It)

This is best for you if:
- You have a moderate level of fitness
- You can handle a combo of hiking, rock climbing, and walking
- You want a guided challenge with a clear training step
- You enjoy big views and want to earn them by moving up a real waterfall route
It also fits people who are nervous about climbing, because you start with an introductory training climb. Many first-timers come away feeling secure and proud, especially when they realize the guides pace the route and teach technique.
But it is not suitable for:
- Children under 10
- Pregnant women
- People under 88 lbs (40 kg)
Also remember the practical rule: you need full body mobility, and the route is exposed.
Getting There: The Locked Gate Before the Two Waterfalls

Meeting point clarity can make or break your day, and this one is specific.
From Wanaka town, drive west along the lake on the Wanaka-Mt Aspiring Road, heading toward Treble Cone Ski Field and Mt. Aspiring National Park. After about 20 minutes, you’ll reach a cattle stop. Pull out immediately to the left in front of 2 waterfalls.
Look for a locked farm gate with the activity provider’s sign on it. Meet at this gate. If you hit the ski field road or a gravel road, you’ve gone too far.
This is one of those setups where you’ll want to arrive early. The spot is small, and the instruction is clear, but it’s still easier to park and ask one question than to reverse while the group is waiting.
What to Pack: Shoes, Swimwear, and the Stuff You Actually Use
The tour gives you climbing safety equipment, but you still need the right personal gear.
Bring:
- Comfortable shoes
- Hiking shoes
- Swimwear
- Weather-appropriate clothing
- Outdoor clothing
You’ll also have a storage area at the base of the waterfall for items you don’t need during the climb. That’s useful if you want to travel light while still having a place for extra clothing.
Water bottle is not included, so bring your own. Also, camera use is at your own risk. If you have a GoPro, it’s recommended to attach it to your person.
Finally, here’s a small but important tip that fits the reality of Wanaka. You’ll be outside, moving, and in sun and water air. Sunscreen makes sense, and a small bag for essentials helps you keep things organized before gear time.
Should You Book This Wanaka Waterfall Cable Climb?
If you want an active, guided half-day in Wanaka that mixes real climbing, dramatic waterfall scenery, and suspension bridge moments, this is a strong choice. The combination of training first, small groups, and included lunch makes it feel doable without losing the thrill.
I’d book it if:
- you want something more memorable than a viewpoint hike
- you like structured instruction
- you’re comfortable with heights enough to stay calm and focused
I’d skip or switch to something else if:
- you panic with exposure
- you can’t meet the full-body mobility requirement
- you fall into the age, weight, or pregnancy limitations
Bottom line: this is not a casual stroll. But if you’re ready for a guided, safety-minded route, you’ll come away with a story you can tell for years, and photos that look like you cheated gravity.
FAQ
Do I need prior climbing experience?
No climbing experience is required. You start with a safety briefing and an introductory training climb at the base of the waterfall before you join the main intermediate route.
How long is the Wanaka waterfall cable climb?
The experience runs for about 4 hours total.
What is the intermediate route height and difficulty like?
The intermediate route includes climbing 320m of vertical cliffs, crossing over blue pools, and using suspension bridges. It also involves a mix of hiking, rock climbing, and walking.
What’s included in the price?
Included items are an expert guide, lunch, climbing safety equipment with briefing, and an introductory training climb.
What should I bring?
Bring comfortable shoes and/or hiking shoes, swimwear, and weather-appropriate outdoor clothing. You should also bring a camera if you want one, since camera use is at your own risk.
Where do I meet the guide?
Meet at the locked farm gate with the activity provider’s sign in front of two waterfalls, after the cattle stop on the Wanaka-Mt Aspiring Road. If you reach the ski field road or gravel road, you have gone too far.
Is a water bottle included?
No. A water bottle is not included.
Who is this tour not suitable for?
It is not suitable for children under 10, pregnant women, and people under 88 lbs (40 kg). The experience also requires full body mobility.
More Tour Reviews in Wanaka
- Wildwire Wanaka- Level 2 (4 Hours)
★ 5.0 · 467 reviews - Bike the Wanaka and Hawea Trails
★ 5.0 · 346 reviews - Lake Wanaka Happy Hour Cruise
★ 4.6 · 313 reviews - Small Group Jet Boat Adventure on the Clutha River from Wanaka
★ 5.0 · 302 reviews
Rope Work in the Gorges
- Wildwire Wanaka- Level 2 (4 Hours)
★ 5.0 · 467 reviews - Wildwire Wanaka- Level 1 (2 Hours)
★ 5.0 · 112 reviews - Wanaka: 2-Hour Beginner Waterfall Cable Climb
★ 4.9 · 108 reviews - Wanaka: Waterfall Climb and Canyon Tour
★ 5.0 · 6 reviews
Over the Crown Range to Wanaka
- Wildwire Wanaka- Level 2 (4 Hours)
★ 5.0 · 467 reviews - Bike the Wanaka and Hawea Trails
★ 5.0 · 346 reviews - Lake Wanaka Happy Hour Cruise
★ 4.6 · 313 reviews - Small Group Jet Boat Adventure on the Clutha River from Wanaka
★ 5.0 · 302 reviews
Lake Wanaka Adventures, side by side.
 ★ 5.0Wildwire Wanaka- Level 2 (4 Hours)From $232467 reviews
 ★ 5.0Bike the Wanaka and Hawea TrailsFrom $80346 reviews
 ★ 4.6Lake Wanaka Happy Hour CruiseFrom $38313 reviews
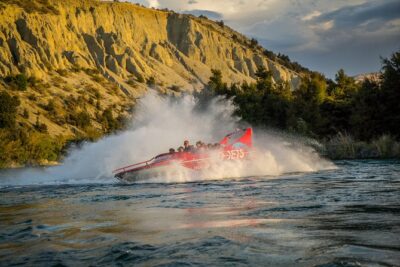 ★ 5.0Small Group Jet Boat Adventure on the Clutha River from WanakaFrom $98302 reviews
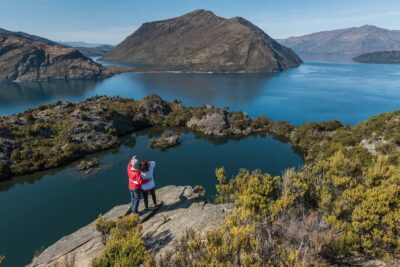 ★ 4.8Wanaka: Water Taxi & Mou Waho Island TourFrom $83299 reviews
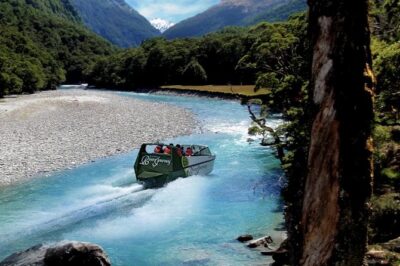 ★ 5.0Jet Boat and Wilderness Walk Tour from WanakaFrom $215259 reviews
 ★ 4.8Wanaka: Tandem Skydive ExperienceFrom $214252 reviews
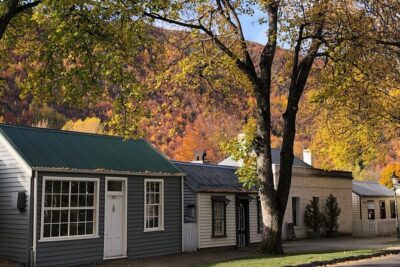 ★ 5.0Arrowtown and Wanaka Highlights Tour from QueenstownFrom $129252 reviews
Also filed under